How Professionals Create Sharp and Detailed Stitch Files
Sharp and detailed stitch files are the heart of great embroidery work. A design may look simple on screen, but turning it into clean stitches is a skilled job. Every line, curve, and stitch must be planned with care.
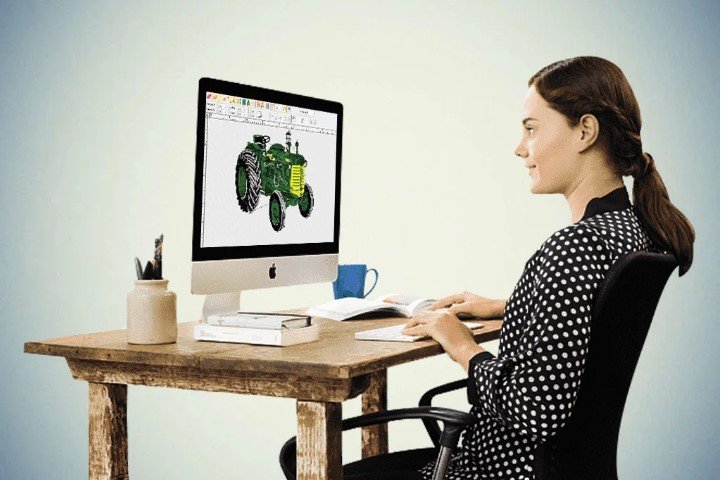
This is why many businesses rely on Embroidery Digitizing Services instead of trying to do everything on their own. Professionals know how to turn artwork into smooth, machine-ready stitch files that run clean and look perfect on fabric.
Why Stitch File Quality Matters
A stitch file controls how the machine behaves. It is not just a design. It is a set of instructions.
Good Stitch Files Give:
- Smooth machine movement
- Clean and sharp designs
- Less thread breakage
- Faster production
- Better fabric results
Poor Stitch Files Cause:
- Messy stitching
- Fabric puckering
- Machine stops
- Wasted material
What Makes a Stitch File “Professional”
A professional file is not made by chance. It is planned carefully.
Key Features:
- Correct stitch path
- Balanced density
- Smart stitch order
- Proper underlay
- Clean trims and jumps
Each part plays an important role.
Step 1: Understanding the Artwork
Professionals always start by studying the design.
They Look At:
- Shape details
- Text size
- Line thickness
- Color areas
Why This Step Matters:
A clear understanding helps avoid mistakes later.
Step 2: Simplifying the Design
Not every detail in artwork can be stitched.
What Professionals Do:
- Remove tiny details
- Simplify complex shapes
- Strengthen weak lines
Result:
The design becomes stitch-friendly.
Step 3: Choosing the Right Stitch Types
Different parts need different stitches.
Satin Stitch
Used for:
- Borders
- Text
- Small shapes
Gives a smooth and shiny look.
Fill Stitch
Used for:
- Large areas
- Solid shapes
Gives strong coverage.
Running Stitch
Used for:
- Outlines
- Fine details
Simple and light stitching.
Step 4: Planning Stitch Direction
Direction changes how the design looks.
Why It Matters:
- Controls shine
- Affects texture
- Improves shape flow
Professionals carefully set angles for each section.
Step 5: Controlling Stitch Density
Density means how close stitches are.
If Too High:
- Fabric becomes stiff
- Threads may break
If Too Low:
- Gaps appear
- Design looks weak
A balanced density is key for clean results.
Step 6: Adding Underlay Stitches
Underlay is the base layer under stitches.
Benefits:
- Supports top stitches
- Keeps fabric stable
- Improves shape
Types of Underlay:
- Edge run
- Zigzag
- Center walk
Experts choose based on fabric and design.
Step 7: Managing Pull Compensation
Fabric moves during stitching.
What Professionals Do:
- Adjust stitch width
- Balance fabric pull
- Prevent shape distortion
This keeps designs accurate.
Step 8: Setting Proper Stitch Order
Order matters more than people think.
Good Order Helps:
- Reduce thread trims
- Avoid overlaps
- Improve machine flow
A clean sequence means smoother production.
Step 9: Reducing Unnecessary Trims
Too many trims slow down machines.
Smart Digitizing Includes:
- Longer stitch paths when possible
- Fewer jump cuts
- Clean transitions
This improves speed and efficiency.
Step 10: Testing the Stitch File
No professional skips testing.
What They Check:
- Stitch flow
- Fabric reaction
- Thread tension
- Design accuracy
Testing helps fix problems early.
Common Problems Professionals Prevent
Experience helps avoid many issues.
Thread Breaks
Cause:
Wrong density or path.
Fix:
Adjust stitch balance and flow.
Fabric Puckering
Cause:
Too many stitches or poor underlay.
Fix:
Add support and reduce density.
Design Distortion
Cause:
Poor pull compensation.
Fix:
Adjust stitch width carefully.
Rough Finish
Cause:
Bad stitch direction.
Fix:
Recalculate angles.
Role of Experience in Digitizing
Experience cannot be replaced by software.
Experts Learn From:
- Real stitching tests
- Machine behavior
- Fabric response
- Customer feedback
This knowledge improves every new file.
A trusted provider like Absolute Digitizer uses hands-on experience to create stitch files that run smoothly and look sharp across different machines and fabrics.
How Fabric Affects Stitch Files
Professionals always consider fabric type.
Cotton
Easy and stable. Most designs work well.
Polyester
Smooth but slightly slippery. Needs careful tension.
Denim
Thick and strong. Needs strong stitches.
Stretch Fabric
Flexible. Needs light density and strong support.
Machine Factors Professionals Consider
A good file is machine-aware.
Important Factors:
- Machine speed
- Needle type
- Thread quality
- Hoop size
Ignoring these can ruin output.
Why Clean Artwork Is Important
A stitch file is only as good as its source.
Clean Artwork Means:
- Clear lines
- Good contrast
- Simple shapes
Bad artwork leads to poor stitching.
Benefits of Professional Stitch Files
Better Quality Output
Designs look sharp and clean.
Faster Production
Machines run without stops.
Less Waste
Fewer errors and rework.
Stronger Brand Image
Professional results build trust.
Services like Absolute Digitizer help businesses maintain consistent quality across all embroidery projects.
Mistakes Beginners Make
Avoid these common errors.
Ignoring Density Settings
Leads to poor stitch balance.
Overcomplicating Designs
Too much detail causes problems.
Skipping Testing
Always test before final run.
Using Auto Settings Only
Manual adjustment is important.
Tips from Real Production Work
These habits improve results.
Keep Files Simple
Simple designs stitch better.
Save Multiple Versions
Keep backup files.
Match Design to Fabric
Not all designs fit all materials.
Review Every Detail
Small mistakes can affect output.
Why Professional Help Matters
Digitizing is both art and technical skill.
Professionals Provide:
- Clean stitch mapping
- Stable machine performance
- Accurate design output
- Reduced production issues
A skilled team like Absolute Digitizer ensures stitch files are optimized for real-world embroidery conditions.
EEAT in Stitch File Creation
Strong results come from strong principles.
Experience
Hands-on stitching knowledge.
Expertise
Deep understanding of stitch behavior.
Authority
Consistent high-quality output.
Trustworthiness
Reliable and accurate results every time.
These principles define professional work.
Final Thoughts
Creating sharp and detailed stitch files is not a simple task. It requires planning, testing, and real experience. Every small step—like stitch direction, density, or underlay—affects the final result.
Professionals focus on quality from the start. They simplify artwork, balance stitches, and test carefully. This is why their results look clean and run smoothly on machines.
If you want consistent embroidery quality, professional digitizing support can make a big difference. With the right approach and expertise, every stitch file can become sharp, stable, and ready for perfect production.


Post Comment